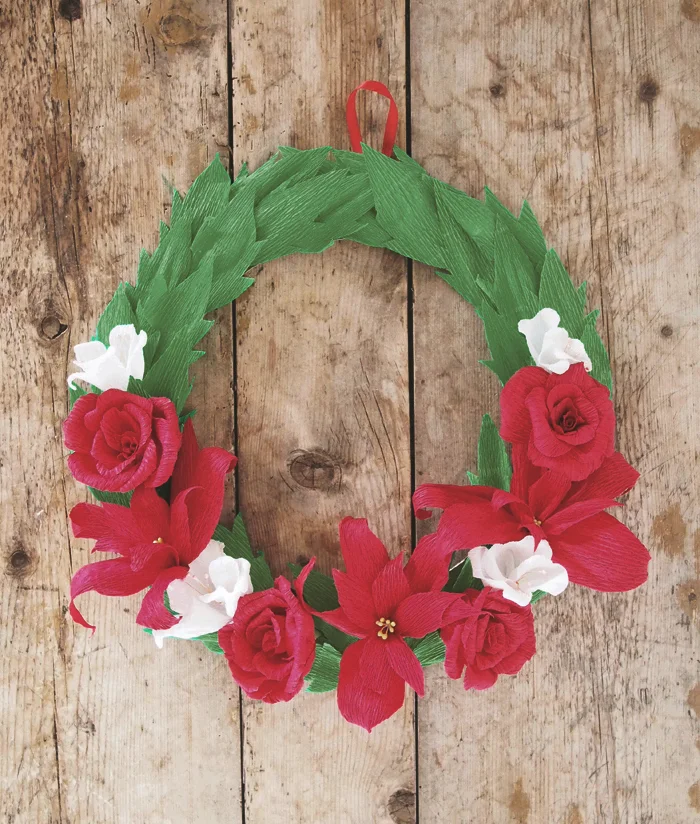
Crepe Paper Holiday Wreath Tutorial
If you have ever experimented with paper, but haven't yet used crepe paper to make flowers, this tutorial is for you. Not only is it really good fun, it's also the perfect way to get in a festive mood this Christmas. By the time your wreath is finished, you'll have a completely unique and beautiful decoration for your home, not to mention a new skill to take into the new year!
Supplies: all can be found easily online
- Premium Italian florist crepe paper - red, green, white (available in a variety of shades; choose your favorites)
- Petal and holly leaf templates
- Florist tape - green, white
- Florist wire - green - one package
- Corrugated cardboard
- Dinner plate, lunch plate
- Paint - green - spray or apply with brush
- Ribbon - red - one piece about 1/2 inch wide x 12 inches long
- Artificial flower stamens, double tip - 28 (I sourced mine here)
- Pencil
- Scissors
- Craft knife
- Stapler
- Cotton buds
- Hot glue gun
- Piercing tool (optional)
Step 1: Make the wreath backing board
a. Use pencil to trace around a dinner plate or other circular object that has a 12 inch diameter (approximate). Center a lunch plate inside the first circle and trace around it. Cut the outer circle with scissors and the inner circle with a sharp craft knife.
b. Spray or brush green paint onto the ring front and outer edge.
Step 2: Make the flowers
Roses: Make 4

a. Using provided templates, cut five small, five medium, and five large petals for each rose from red crepe paper. I have found five of each size to be a nice amount, but if you want your roses to be extra full, just add more. Tip: Save time and your hands: fold crepe paper into layers so five petals can be cut at once.
b. Attach your first petal to a length of florist wire by twisting it around the wire. Apply green florist tape* at the petal base. As you add remaining petals from smallest to largest, fan out the middle of each one and curl back the top edge by rolling it around a cotton bud to create the rose shape.
*If you haven't used florist tape before, you are in for a treat! Just stretch the tape and it will get sticky, then pull it around the wire with your petal attached.
Snowdrops: Make 4

a. Take four double tip stamens and snip off the heads from one end with scissors; discard the snipped heads. Attach stamens with white florist tape to the top of a piece of wire.
b. For each snowdrop, cut four white crepe paper petals using the provided template. Use a similar technique as with the roses... fan out the middle of each petal and curl the tip around a cotton bud. Add all four petals with white florist tape, making sure the stamens can be seen poking out of the top.
Poinsettias: Make 3

a. Fold four stamens in half to make a group of eight stamen heads. Add the stamens to the top of a wire using green florist tape.
b. Secure the first five small petals in a star shape around the stamens. Repeat with the large petals, staggering them so the petal layers aren't lined up exactly.
Step 3: Cut the holly leaves:

Cut about 25-35 holly leaves using the template. These are nowhere near as fiddly as the flowers!
Step 4: Putting it all together
a. Loop the ribbon and staple it to the top back of the cardboard ring.
b. Attach your flowers to the ring by poking each wire through the cardboard. Twist the wires together behind the ring so the flowers are secure against the front. Snip off excess wire. Tip: If you have a sharp paper piercing tool, it may be helpful to make holes for the wires first.
c. Attach the holly leaves by applying a bit of hot glue to the end of each one and arranging them around the flowers and upward to the ribbon loop at the top.
There you have it, an afternoon of joy and a gorgeous Christmas decoration for inside your home!
